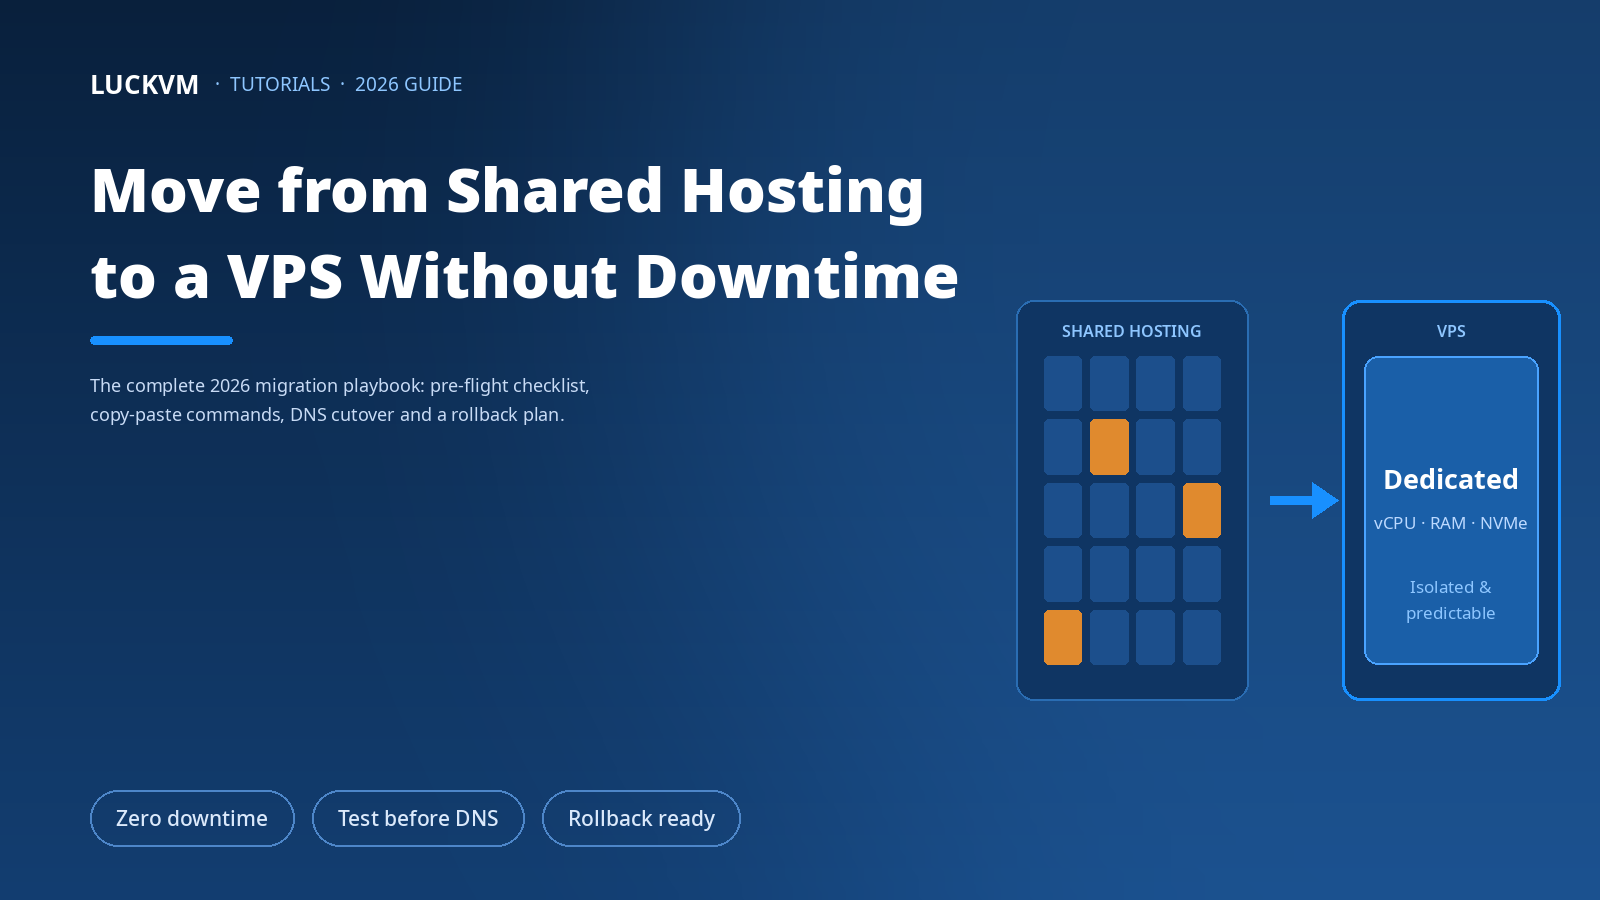
Quick Answer (TL;DR)
A zero-downtime migration from shared hosting to a VPS comes down to four moves: (1) build and fully test the new server before you touch DNS, (2) lower your DNS TTL to 300 seconds at least 24 hours in advance, (3) sync your files and databases twice — once early, once right before cutover, and (4) keep the old host running for one to two weeks as a rollback.
Do this and your visitors see no interruption; the DNS switch itself resolves in minutes. For a standard WordPress, WooCommerce, or PHP site, the whole migration is usually 3–6 hours of real work spread across one or two days.
1. First, Do You Actually Need a VPS?
Shared hosting is fine until it isn't. A VPS stops being optional the moment your site starts losing money to the limits of a shared plan. These are the signals that you have outgrown shared hosting:
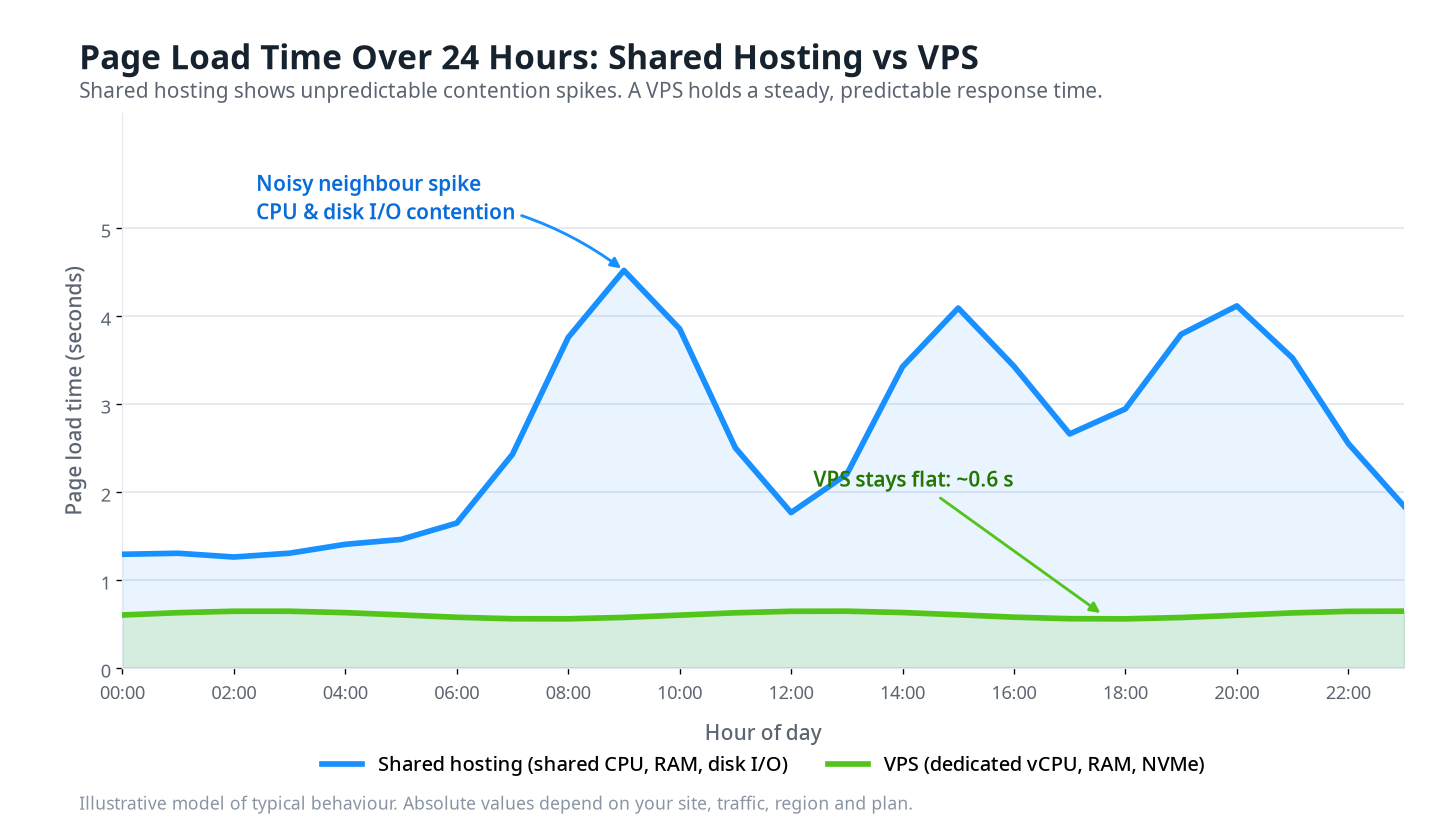
- Your site slows down unpredictably. On shared hosting, CPU, RAM, and disk I/O are shared with hundreds of other accounts. When a "noisy neighbour" spikes, your pages slow down — and you cannot do anything about it.
- You hit hidden resource limits ("entry processes", "CPU seconds", "concurrent connections"). Hosts throttle or suspend accounts that exceed them, often during your busiest hour.
- You need software the host will not install — a specific PHP extension, Redis, Node.js, Docker, Elasticsearch, or a custom cron job.
- Your traffic is growing and the bill is scaling badly. You pay more for a bigger shared tier that still shares resources.
- You need real security control. On shared hosting, one compromised account on the same server can put your data at risk. A VPS isolates you.
| Shared hosting | VPS | |
|---|---|---|
| Resources | Shared with hundreds of accounts | Dedicated vCPU, RAM, and disk allocation |
| Performance | Unpredictable (noisy neighbours) | Consistent and predictable |
| Control | Control panel only, no root access | Full root access, any stack you want |
| Scaling | Upgrade to a bigger shared tier | Resize the VPS without migrating again |
| Security | One bad neighbour affects everyone | Isolated from other customers |
| Typical cost | $2–$10 / month | $5–$30 / month (entry to mid-range) |
2. What "No Downtime" Actually Means
Before the steps, get the mental model right. There are two kinds of downtime, and only one of them is real:
- Real downtime is when the site returns errors or cannot be reached. Your goal is to keep this at zero.
- Perceived downtime is when DNS resolves to the old server for some users while others already hit the new one. This is normal, brief, and invisible if you prepare for it.
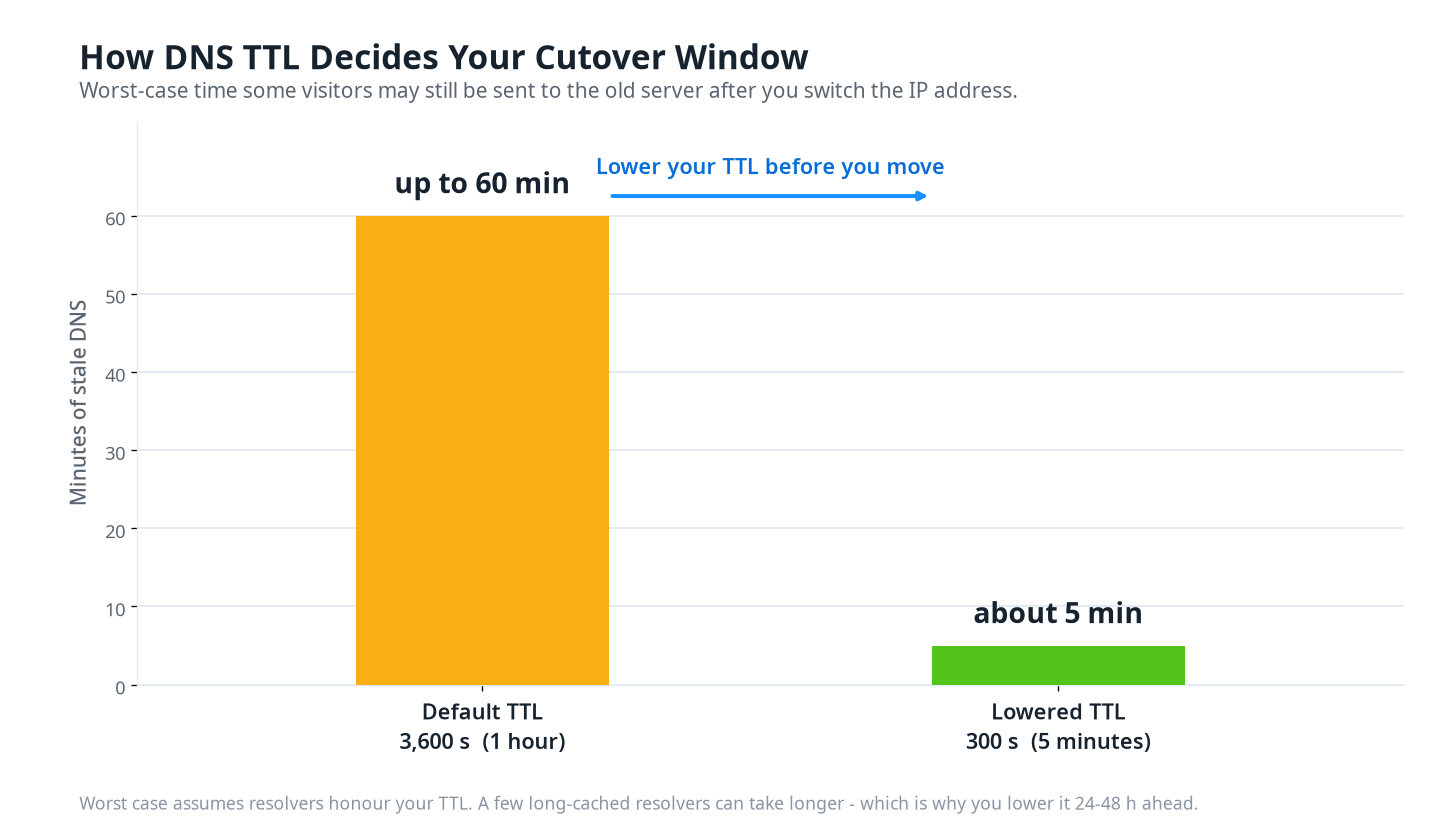
The trick that makes this possible is DNS TTL (time to live) — how long resolvers cache your domain's IP address. If your TTL is the default 3,600 seconds (1 hour), some visitors keep hitting the old server for up to an hour after you change the IP. Lower the TTL to 300 seconds before you switch, and the change propagates in minutes instead. That single preparation step is what separates a smooth migration from a stressful one.
3. The Pre-Migration Checklist
Do not skip this. Most "failed" migrations fail here, not at the server.
| # | Item | Why it matters |
|---|---|---|
| 1 | Inventory your site | List every domain, subdomain, database, email account, and cron job. Missing one breaks a feature after cutover. |
| 2 | Check your stack versions | Record your PHP and MySQL/MariaDB versions. Test compatibility if the VPS runs a different PHP major version. |
| 3 | Note DNS records | Export your full zone: A, AAAA, CNAME, MX, TXT (SPF/DKIM/DMARC). You will only change the web A record. |
| 4 | Export cron jobs | On cPanel: crontab -l > cron_backup.txt. Recreate them on the VPS. |
| 5 | Pick the right VPS size | See the sizing table in Section 7. Migrating twice is worse than sizing once, correctly. |
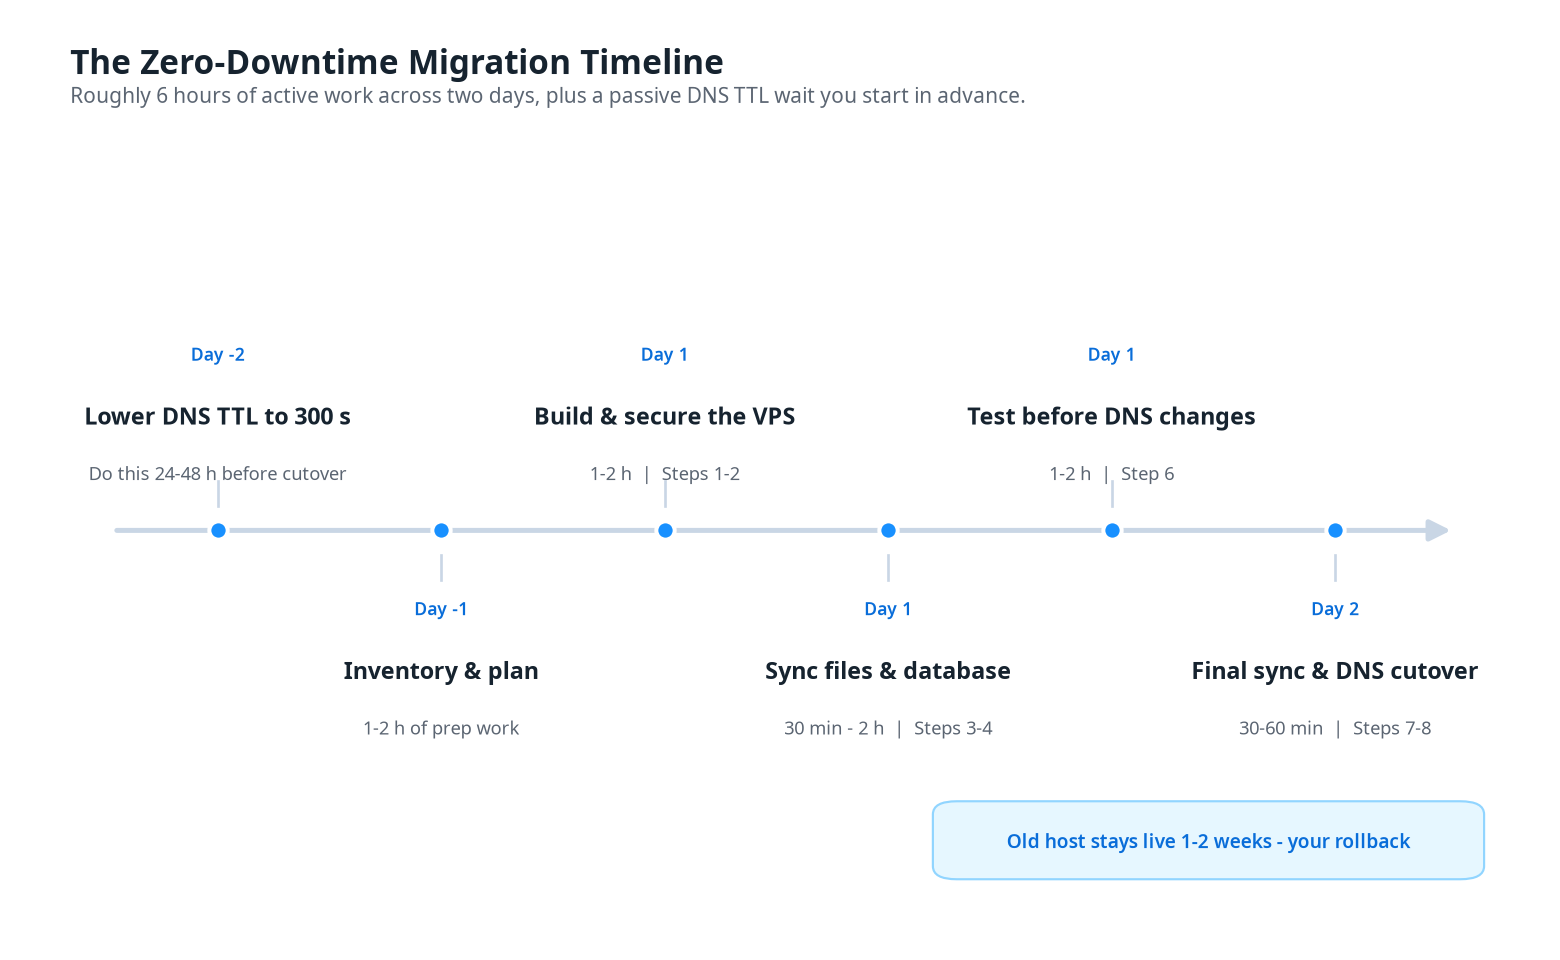
| 6 | Lower DNS TTL now | Set TTL to 300s 24–48 hours before cutover so the old long TTL expires everywhere. |
| 7 | Prepare the SSL plan | Decide how TLS will be issued on the VPS (e.g. Let's Encrypt / certbot). |
| 8 | Book a low-traffic window | Even with zero downtime, do the final cutover during your quietest hours. |
| 9 | Keep the old host live | This is your rollback. Never cancel it before the new server has proven itself for a week. |
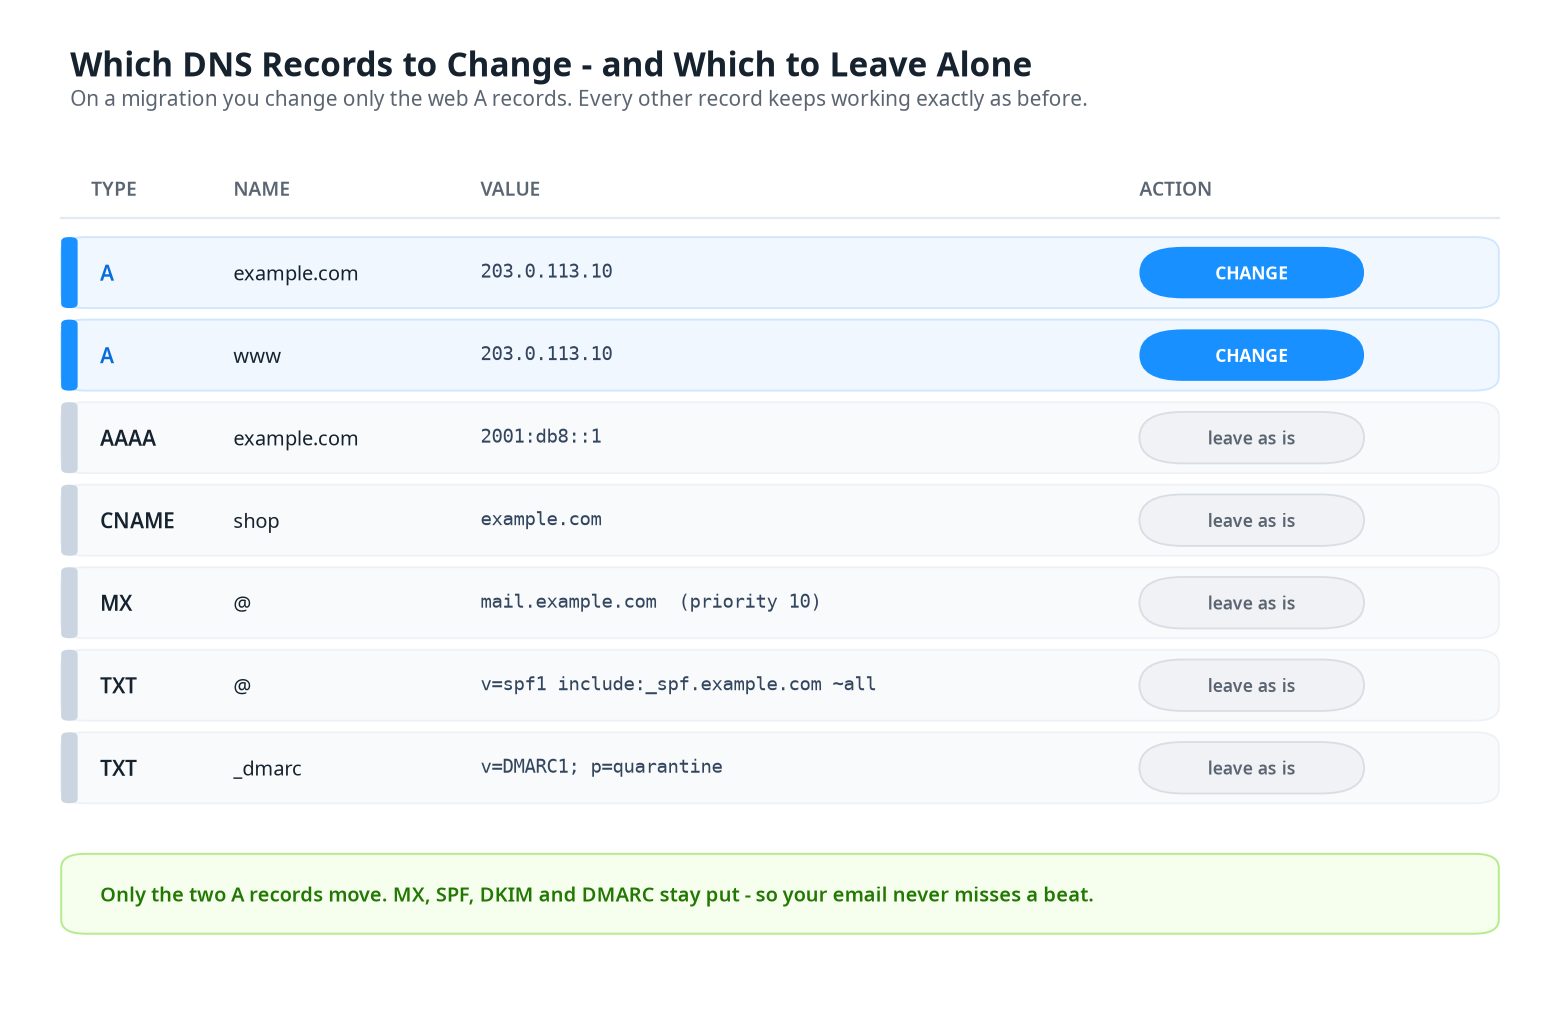 Figure 3 — Only the web A records move. Your mail, SPF, DKIM and DMARC records stay exactly where they are.
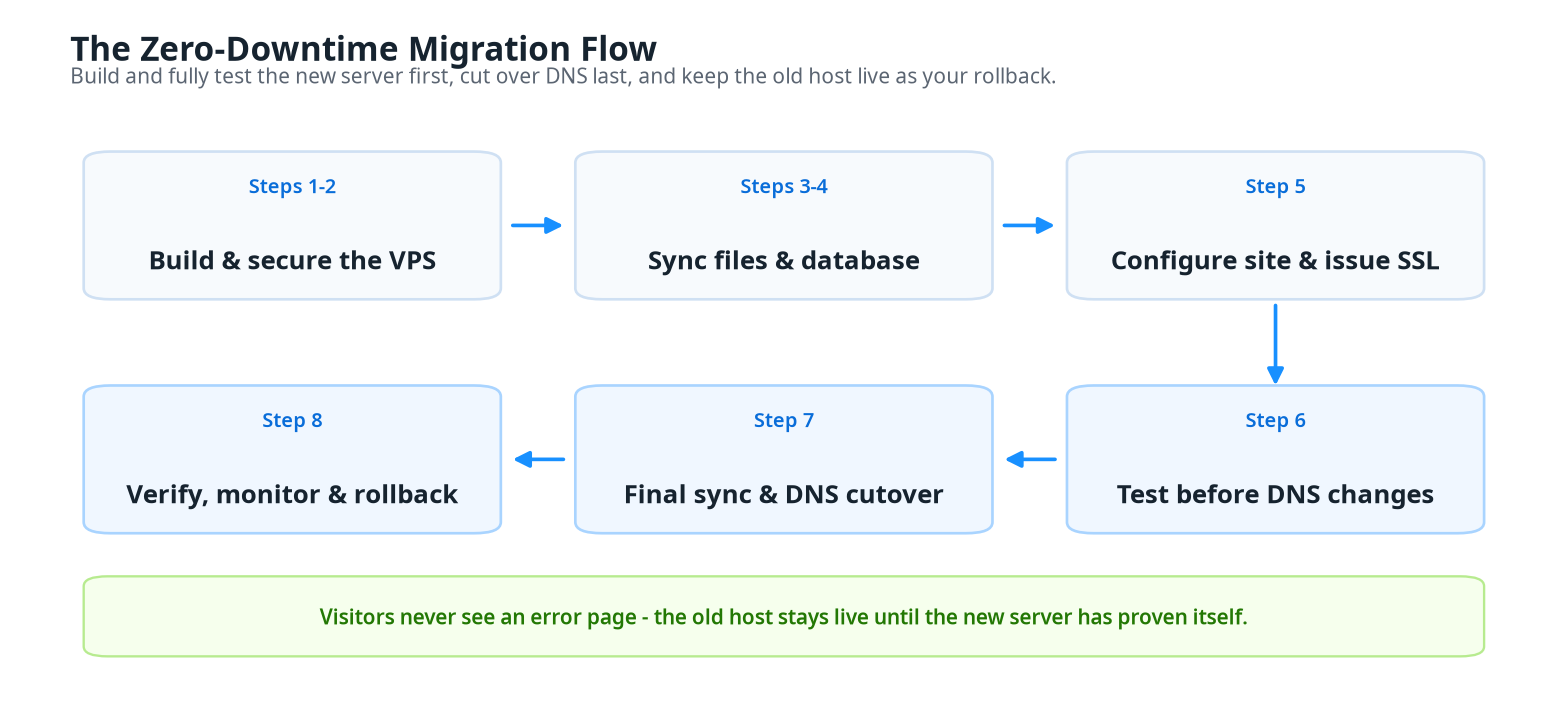
4. The Zero-Downtime Migration, Step by Step
The commands below assume Ubuntu 24.04 and a typical PHP site (WordPress, WooCommerce, Laravel, or similar). Adapt package names for other distributions.
Step 1 — Provision and secure the new VPS
# Create a non-root user with sudo
adduser deploy
usermod -aG sudo deploy

# Copy your SSH key so you can log in without a password
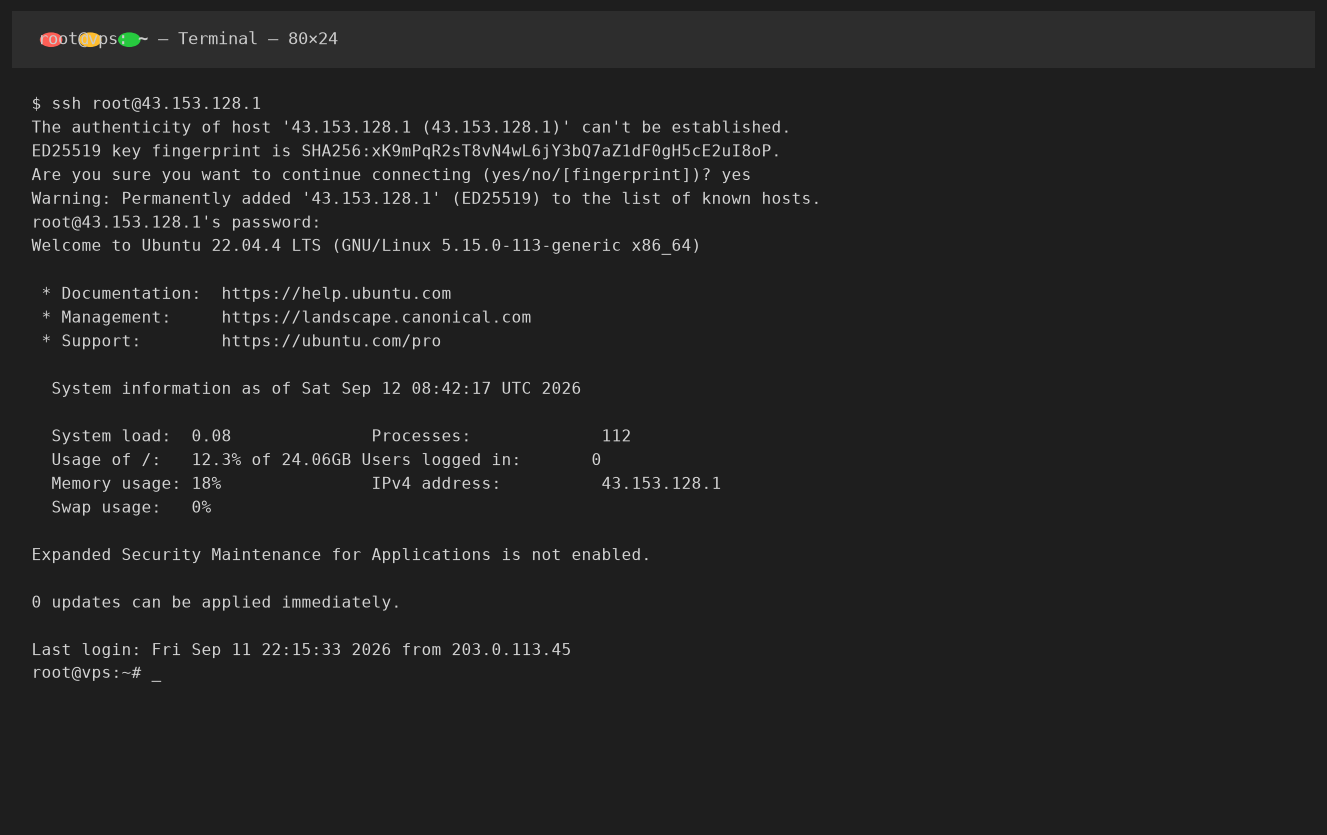
ssh-copy-id deploy@203.0.113.10

# Disable password login (only after you confirm key login works)
sudo sed -i 's/^#\?PasswordAuthentication.*/PasswordAuthentication no/' /etc/ssh/sshd_config
sudo systemctl restart ssh

# Turn on the firewall
sudo ufw allow OpenSSH
sudo ufw allow 'Nginx Full'
sudo ufw enable
Step 2 — Install your web stack
sudo apt update && sudo apt upgrade -y
sudo apt install -y nginx mariadb-server php-fpm php-mysql \
  php-curl php-xml php-mbstring php-zip unzip \
  certbot python3-certbot-nginx
sudo systemctl enable --now nginx mariadb
sudo mysql_secure_installationStep 3 — Copy your files with rsync
rsync is resumable and only transfers what changed — exactly what you need for the second, final sync later.
rsync -avz --delete -e ssh ~/public_html/ deploy@203.0.113.10:/var/www/example.com/

# Set correct ownership and permissions
sudo chown -R www-data:www-data /var/www/example.com
sudo find /var/www/example.com -type d -exec chmod 755 {} \;
sudo find /var/www/example.com -type f -exec chmod 644 {} \;wp-content / upload folders separately.Step 4 — Export and import your databases
# On the OLD host — --single-transaction gives a consistent dump without locking the site
mysqldump -u dbuser -p --single-transaction --routines --triggers \
  --default-character-set=utf8mb4 example_db | gzip > example_db.sql.gz

# Transfer it
scp example_db.sql.gz deploy@203.0.113.10:/tmp/

# On the NEW server — create the database and user, then import
sudo mysql -e "CREATE DATABASE example_db CHARACTER SET utf8mb4 COLLATE utf8mb4_unicode_ci;"
sudo mysql -e "CREATE USER 'dbuser'@'localhost' IDENTIFIED BY 'a-strong-password'; \
  GRANT ALL PRIVILEGES ON example_db.* TO 'dbuser'@'localhost'; FLUSH PRIVILEGES;"
gunzip
Match the character set (utf8mb4) to avoid mangled emoji and non-Latin characters, then update your application's database credentials (wp-config.php for WordPress).
Step 5 — Configure the site and issue SSL
server {
    listen 80;
    server_name example.com www.example.com;
    root /var/www/example.com;
    index index.php index.html;

    location / {
        try_files $uri $uri/ /index.php?$args;
    }

    location ~ \.php$ {
        include snippets/fastcgi-php.conf;
        fastcgi_pass unix:/run/php/php8.3-fpm.sock;
    }
}
sudo ln -s /etc/nginx/sites-available/example.com /etc/nginx/sites-enabled/
sudo nginx -t && sudo systemctl reload nginx
# Issue a free TLS certificate
sudo certbot --nginx -d example.com -d www.example.comStep 6 — Test everything before DNS changes
This step is what guarantees zero downtime. Point your own computer at the new server without touching public DNS:
# macOS/Linux: /etc/hosts  ·  Windows: C:\Windows\System32\drivers\etc\hosts
sudo nano /etc/hosts

# Add this line:
203.0.113.10   example.com   www.example.com
Now browse the site as a visitor would: homepage, several deep pages, search, login, contact forms, and — if you run a store — add to cart and a test checkout. Test on a phone over mobile data too (and remove the hosts entry when done).
Step 7 — Lower TTL, do the final sync, then cut over DNS
- Final file sync — run the same
rsynccommand again; only changes transfer. - Final database sync — take one more dump and import it, so orders, comments, and posts made during your work are not lost.
- Switch the A record — point
example.com(andwww) to the new server's IP. Leave MX and other records untouched. - Verify propagation with
dig +short example.comand a global tool such as whatsmydns.net.
Step 8 — Verify, monitor, and keep your rollback
# Watch the web server error log after cutover
sudo tail -f /var/log/nginx/error.log

# Confirm certificate auto-renewal works
sudo certbot renew --dry-run
Confirm HTTPS loads with a valid certificate, http redirects to https, no 404s on your most important URLs, and scheduled tasks run. Then restore your DNS TTL to a normal value (e.g. 3,600 seconds) and keep the old host live for one to two weeks. If anything goes wrong, your rollback is simply pointing the A record back.
5. How Long Does the Migration Take?
| Phase | Active time | Notes |
|---|---|---|
| Planning and inventory | 1–2 hours | Checklist in Section 3 |
| Provision and secure the VPS | 30–60 min | Step 1 |
| Build the web stack | 30–60 min | Step 2 |
| Copy files and databases | 30 min – 2 hours | Depends on site size |
| Test on the new server | 1–2 hours | Step 6 — do not rush this |
| DNS TTL wait | 0 (passive) | Started 24–48 h earlier |
| Cutover and verification | 30–60 min | Steps 7–8 |
| Total | ~4–7 hours over 1–2 days |
6. Five Mistakes That Cause Downtime (and How to Avoid Them)
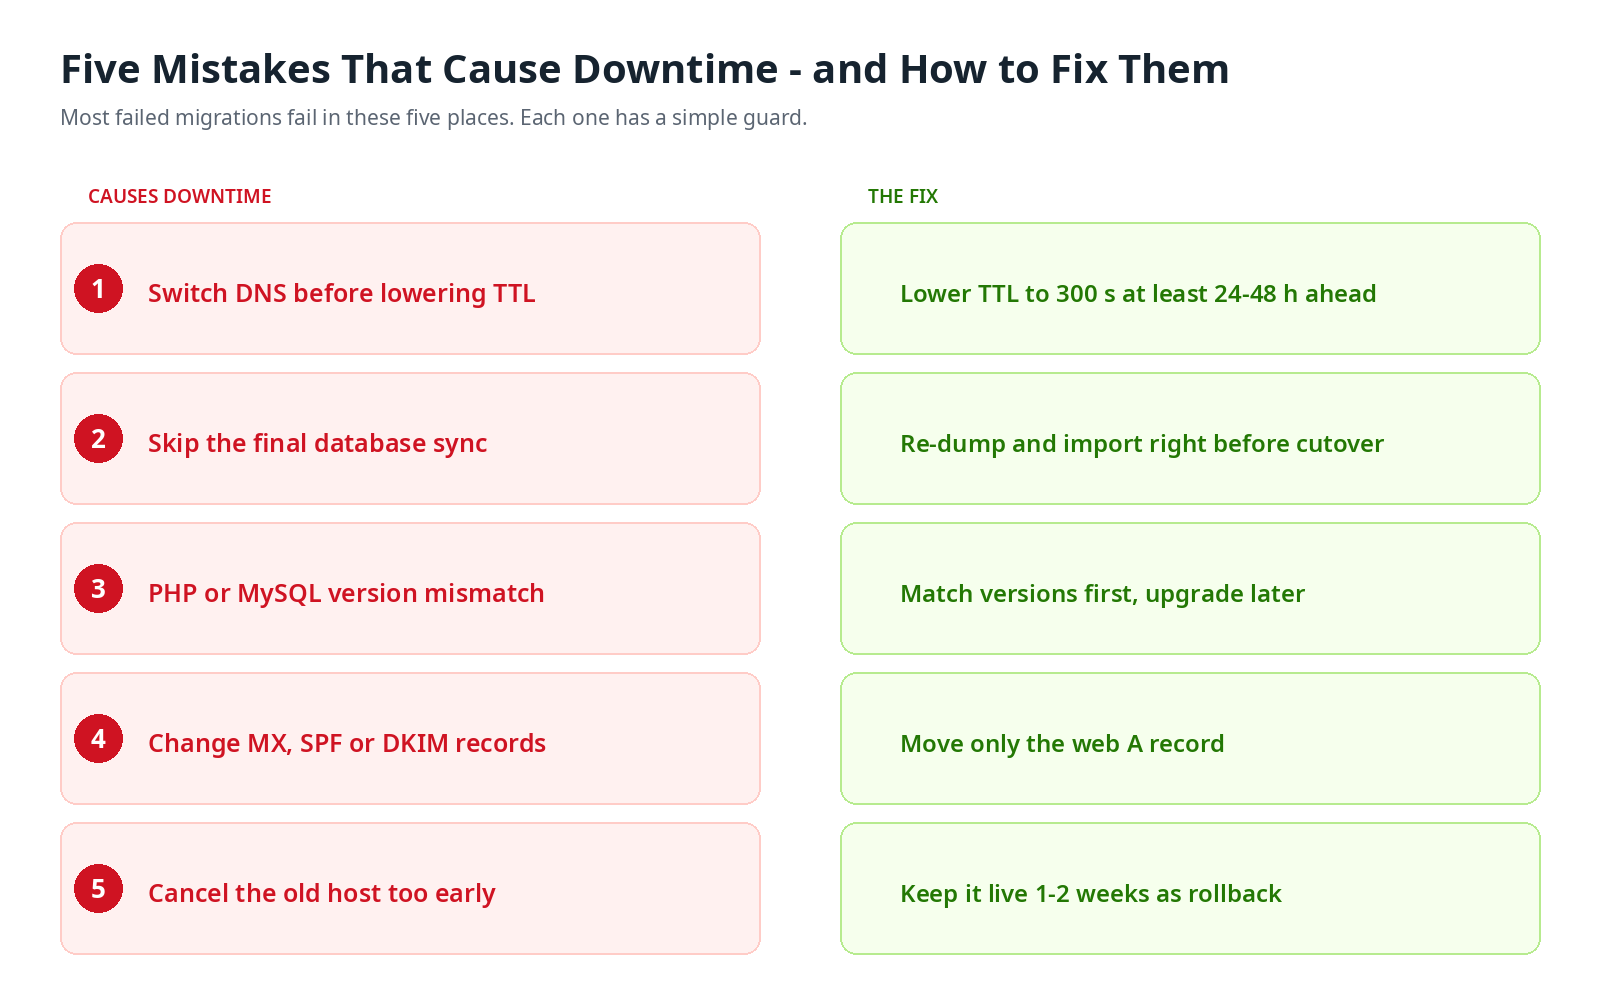
- Switching DNS before lowering TTL. The most common cause of a slow, messy cutover. Lower TTL first — always.
- Forgetting the final database sync. Anything created between your first copy and cutover (orders, comments, form entries) is lost. Always re-sync right before switching.
- PHP or MySQL version mismatch. A plugin that ran on PHP 8.1 can fatal-error on PHP 8.4. Match versions first, upgrade later.
- Ignoring email and DNS side records. Changing the wrong record breaks mail. Only move the web A record; leave MX, SPF, DKIM, and DMARC alone.
- Cancelling the old host too early. Your rollback disappears with it. Keep it for one to two weeks.
7. Choosing a VPS for the Move
Size for where your site is going, not where it is now — you do not want to migrate twice.
| Site type | vCPU | RAM | Storage | Notes |
|---|---|---|---|---|
| Personal blog / low traffic | 1 | 1 GB | 20–40 GB NVMe | Entry plan; fine with caching |
| Small business / brochure site | 2 | 2–4 GB | 40–70 GB NVMe | Comfortable headroom |
| WooCommerce / high-traffic site | 4 | 8 GB | 80–120 GB NVMe | Add Redis / object cache |
| High concurrency / multi-site | 8 | 16 GB+ | 160 GB+ NVMe | Scale vertically as needed |
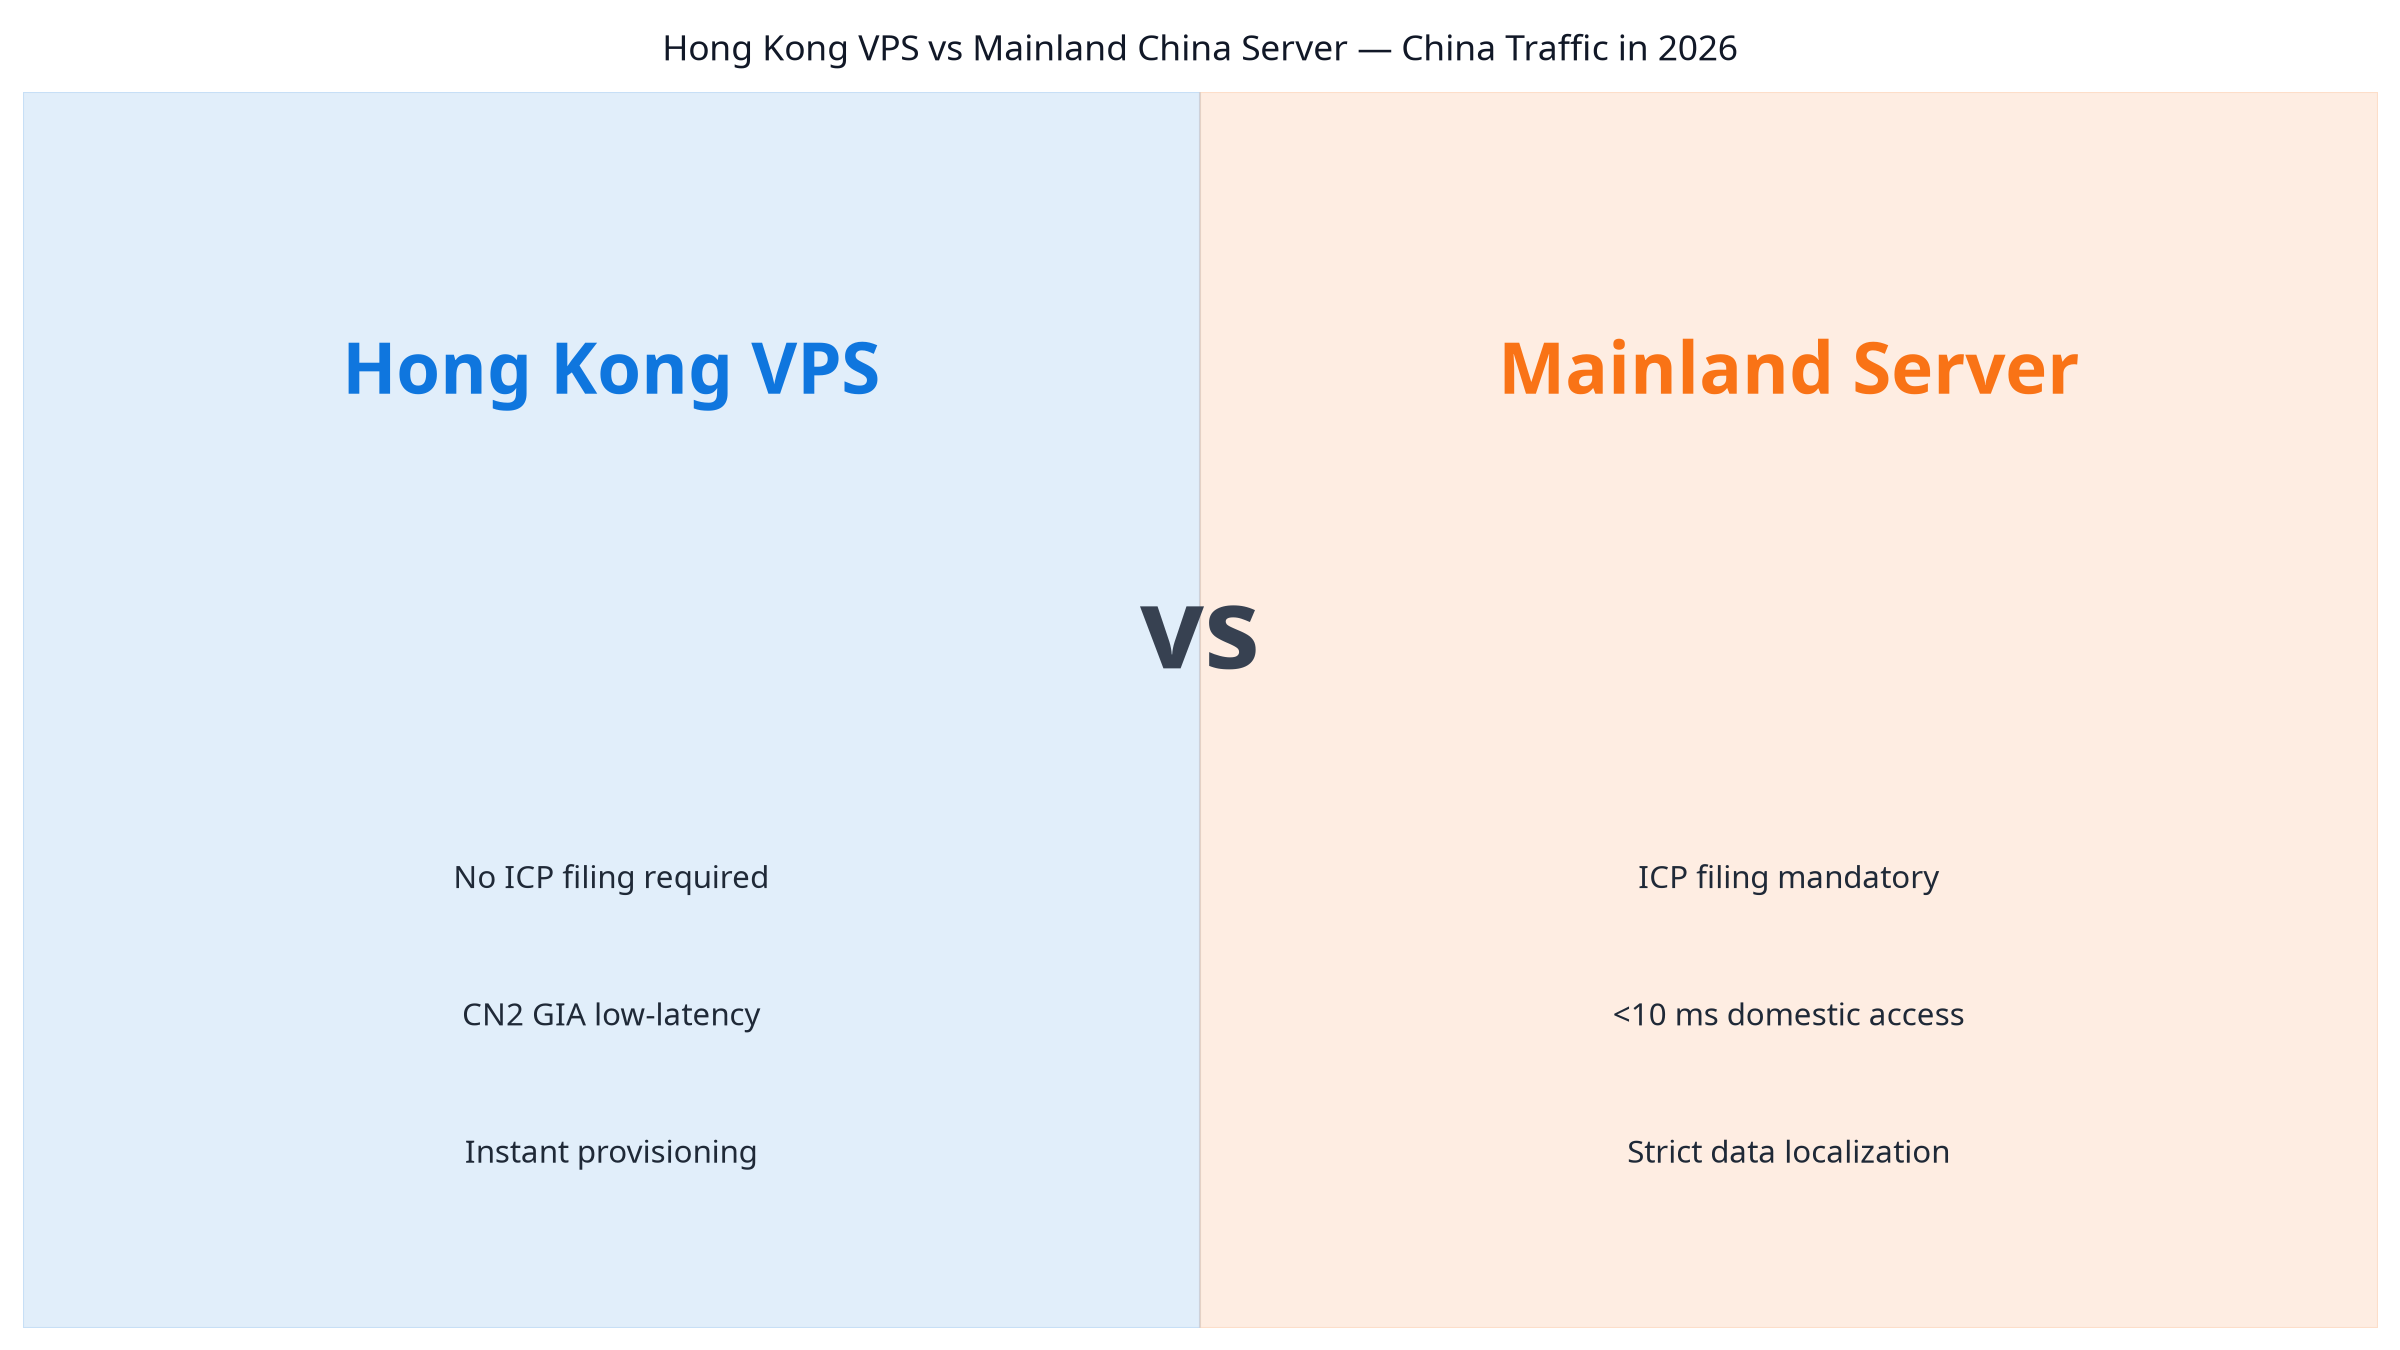
Route choice matters as much as size. If your visitors are in mainland China, a CN2 GIA route (available on LuckVM's Hong Kong and US Los Angeles nodes) gives far lower latency and packet loss than standard international BGP. If your audience is in Southeast Asia, a Singapore node is the better centre of gravity.
| Region | Route | Plan | vCPU | RAM | Storage | Bandwidth | Price |
|---|---|---|---|---|---|---|---|
| Hong Kong | CN2 GIA | Starter | 1 | 1 GB | 70 GB NVMe | 10 Mbps | $8.80 / mo |
| Hong Kong | CN2 GIA | Business | 2 | 4 GB | 70 GB NVMe | 10 Mbps | $26.40 / mo |
| Hong Kong | CN2 GIA | Professional | 4 | 8 GB | 70 GB NVMe | 10 Mbps | $48.40 / mo |
| Hong Kong | CN2 GIA | Enterprise | 8 | 16 GB | 70 GB NVMe | 10 Mbps | $81.40 / mo |
| Singapore | International BGP | Starter | 1 | 1 GB | 70 GB NVMe | 10 Mbps | $11.00 / mo |
| Japan (Tokyo) | SoftBank / IIJ / NTT BGP | Featured | 2-core | 4 GB | 70 GB SSD | 10 Mbps | $30.80 / mo |
| US (Los Angeles) | CN2 GIA | Featured | 4-core | 8 GB | 120 GB SSD | 30 Mbps + 10 Gbps DDoS | $73.40 / mo |
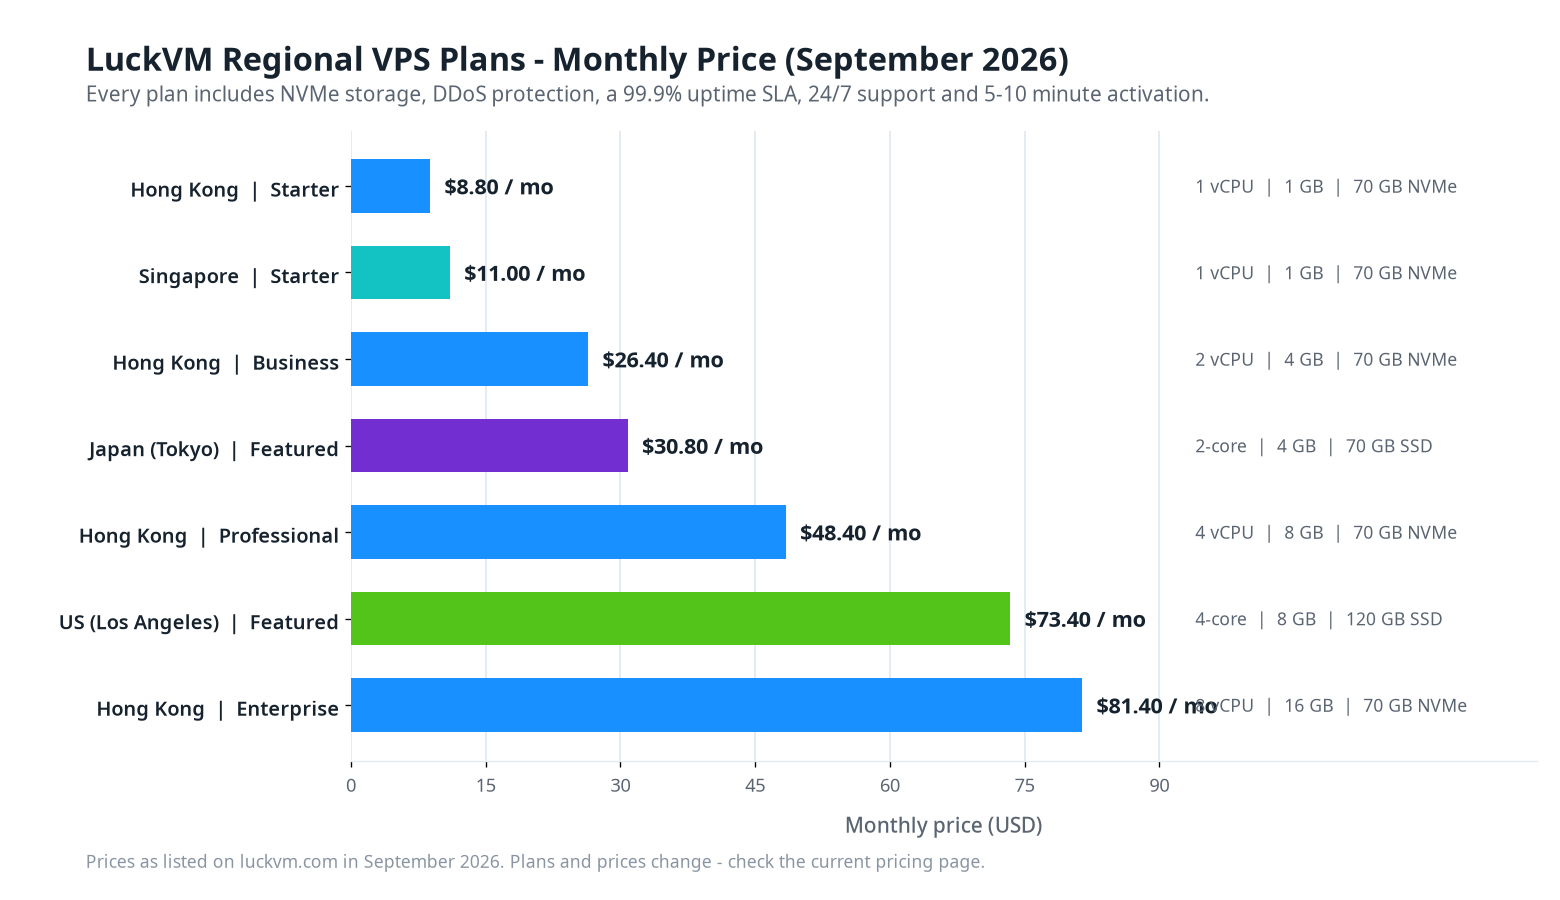 Figure 7 — LuckVM regional plans by monthly price, September 2026.
8. LuckVM's Migration Assistance
If you would rather not run the commands yourself, LuckVM's team supports multiple migration paths:
- API-driven migration for cloud-to-cloud transfers
- Direct upload of VM images (QCOW2, VMDK, VHD)
- Physical-to-virtual (P2V) conversion
- Live migration with minimal downtime using replication tools
Migration assessment and planning are available for enterprise customers, and the team can assist with database migrations, application replatforming, and DNS cutover strategies. Combined with 24/7/365 ticket support in English and Chinese, this is the fastest way to move without risking your live site.
9. Frequently Asked Questions
How long does migrating from shared hosting to a VPS take?
Plan on 3–6 hours of active work spread over one or two days, plus a passive 24–48 hour DNS TTL wait that you start in advance. Site size is the biggest variable.
Can I migrate with truly zero downtime?
Yes — if you build and test the new server first and lower your DNS TTL beforehand. Perceived downtime is normally zero; the switch itself resolves within minutes.
Will moving to a VPS hurt my SEO rankings?
Not if URLs, content, and SSL stay identical and the new server is faster. Better performance can improve Core Web Vitals and rankings. The real risk is a long outage, which is exactly what this process avoids.
Do I need Linux skills to do this?
Basic comfort with SSH and copy-pasting commands is enough for a typical site migration. For complex stacks, use LuckVM's migration assistance or a managed migration service.
What size VPS do I need?
Start from the sizing table in Section 7: 2 vCPU / 2–4 GB covers most small business sites, and 4 vCPU / 8 GB suits WooCommerce and high-traffic sites. You can resize later without migrating again.
Can I keep my email on the old host?
Yes. Leave your MX and TXT records unchanged and move only the web A record. If you later move email, do it as a separate, planned project.
What if something breaks after the switch?
Keep the old host live for one to two weeks. Rolling back is as simple as pointing the A record back to the old IP.
Does LuckVM help with migration?
Yes. LuckVM supports API-driven, image-upload, P2V, and live migration paths, plus database migrations and DNS cutover planning, with 24/7/365 support in English and Chinese.
Ready to Make the Move?
A VPS gives your site the dedicated resources, control, and performance that shared hosting cannot. With the process above, you can move without your visitors noticing.
- Deploy a LuckVM VPS — activation in 5–10 minutes, from $8.80/month
- Hong Kong CN2 GIA VPS — lowest latency to mainland China
- Compare all regions — Hong Kong, Japan, US, Singapore, Korea, Taiwan, Vietnam