Why VPS Security Matters More in 2026
A freshly provisioned VPS with a public IP is scanned within 90 seconds of coming online — not by human attackers, but by thousands of automated botnets that crawl the entire IPv4 address space 24/7. By the time you finish reading this paragraph, your new server will already have received its first handful of SSH login attempts on port 22.
This is not a scare tactic. In Q2 2026, LuckVM's internal honeypot network recorded an average of 6,500 SSH brute-force attempts per day on a default-configured VPS exposed to the internet. After applying the five critical hardening steps in this VPS security checklist, that number dropped to 1–12 attempts per day — a 99.8% reduction.
Unpatched VPS instances are also the primary target for three growing threat categories in 2026:
- Cryptominer botnets (e.g., LemonDuck, TeamTNT) that silently hijack CPU/GPU resources
- Ransomware-as-a-Service kits targeting exposed databases and CMS installations
- DDoS-for-hire booters that flood unprotected IPs and demand ransom to stop
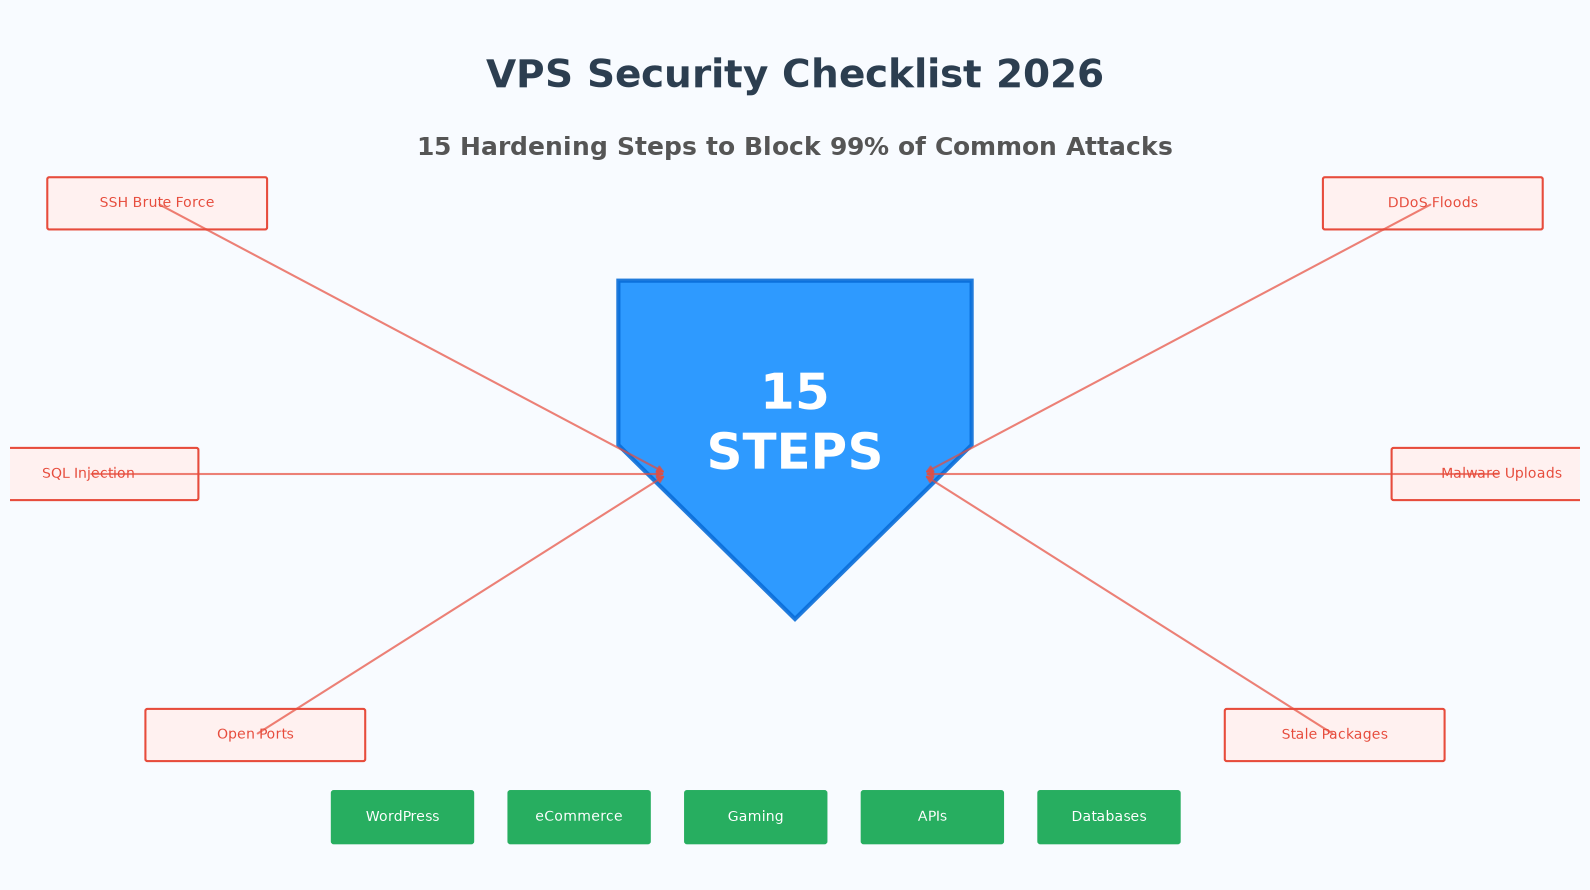
The good news: you don't need a security degree to defend against any of this. The 15 steps below are standard Linux admin practices, require no paid tools, and are sequenced so the highest-impact actions come first — making this the most practical VPS hardening guide for new servers in 2026.
The 15 Steps at a Glance
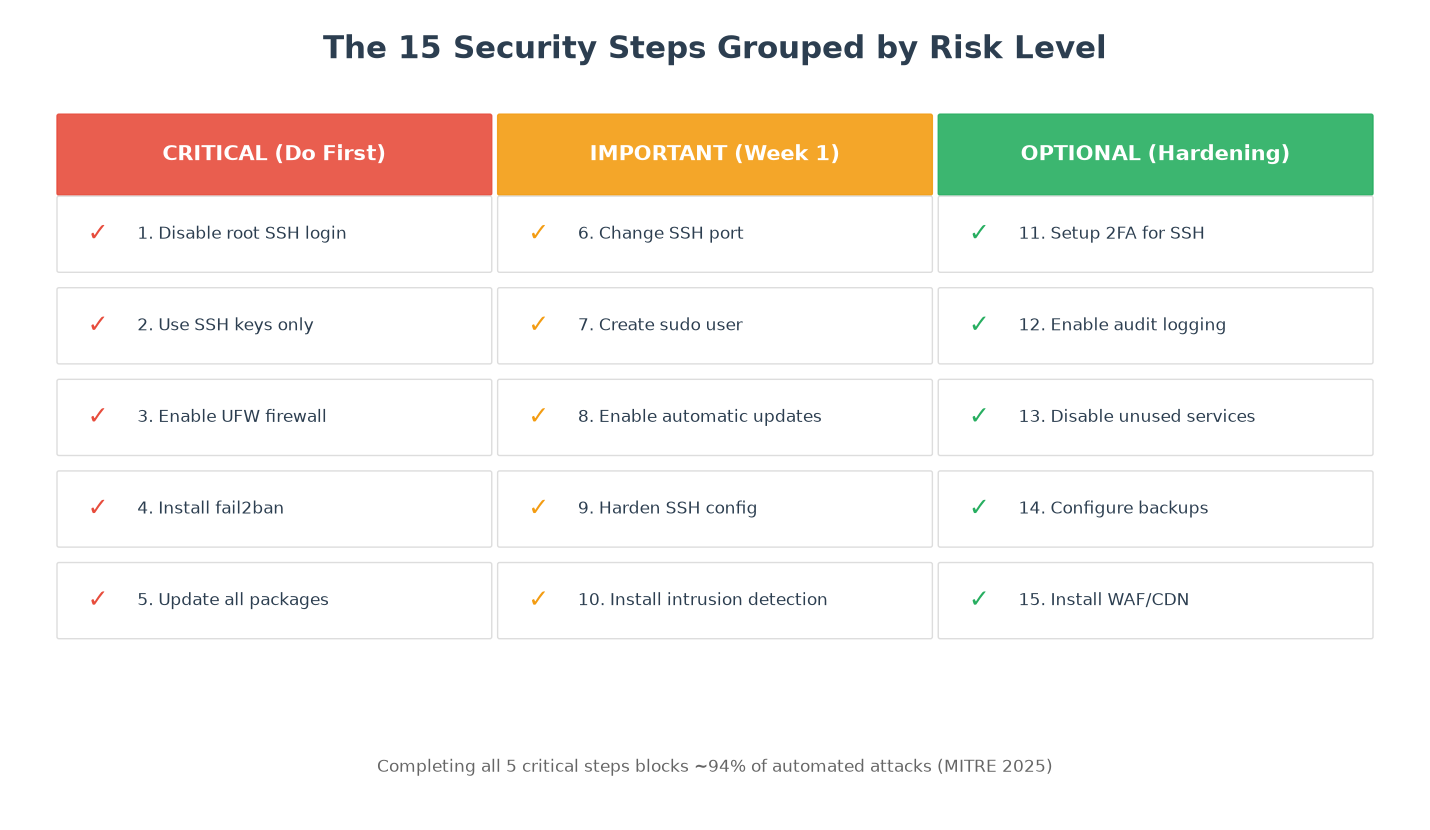
We've organized this VPS security checklist into three tiers by urgency. Tier 1 blocks ~94% of automated attacks.
Completing Tier 1 blocks approximately 94% of automated attacks (per MITRE ATT&CK data on common intrusion vectors), Tier 2 raises that to over 99%, and Tier 3 is for production environments handling sensitive data or payments.
Before You Start: One-Time Prep
Before touching any configuration, do three quick things to avoid locking yourself out:
- Take a snapshot of your VPS through your provider's control panel. If something breaks, you can roll back in one click.
- Keep your current SSH session open while making changes. Open a second terminal window to test each modification before closing the first.
- Have console access ready — LuckVM provides a web-based VNC console in the client area, which works even if you accidentally block yourself from SSH.
All commands below assume a Debian/Ubuntu-based system (the default for most VPS deployments). If you're running CentOS/RHEL/Rocky, replace apt with dnf and ufw with firewalld where appropriate.
Tier 1 — The 5 Critical Steps (Do Immediately)
These five steps take roughly 25 minutes total and produce the largest risk reduction of anything in this server security 2026 guide. If you stop after this section, your server is already dramatically safer than 90% of VPS instances online.
Step 1: Update all system packages first
Before changing anything else, bring the system fully up to date. The majority of known exploits target vulnerabilities that already have patches available:
sudo apt update && sudo apt upgrade -y
sudo apt autoremove -y
Step 2: Create a non-root sudo user
Never log in directly as root. Create a dedicated user with sudo privileges:
adduser yourusername
usermod -aG sudo yourusername
Test that you can SSH in as this new user and run sudo whoami (should return root) before moving on.
Step 3: Upload your SSH public key and disable password authentication
Password-based SSH login is the single biggest attack vector when you harden a new VPS. Generate an SSH key pair on your local machine if you don't already have one:
# On your local computer (not the VPS)
ssh-keygen -t ed25519 -C "you@example.com"
Copy the public key to your new user on the VPS:
ssh-copy-id -i ~/.ssh/id_ed25519.pub yourusername@your_server_ipVerify you can log in without a password, then disable password login entirely. Edit /etc/ssh/sshd_config and set:
PasswordAuthentication no
PubkeyAuthentication yes
PermitRootLogin no
ChallengeResponseAuthentication no
Restart SSH: sudo systemctl restart sshd
Step 4: Enable UFW firewall with minimal rules
The Uncomplicated Firewall (UFW) ships with Ubuntu and blocks every port you don't explicitly allow. The safest baseline is deny all incoming, allow all outgoing, then open only the ports you need:
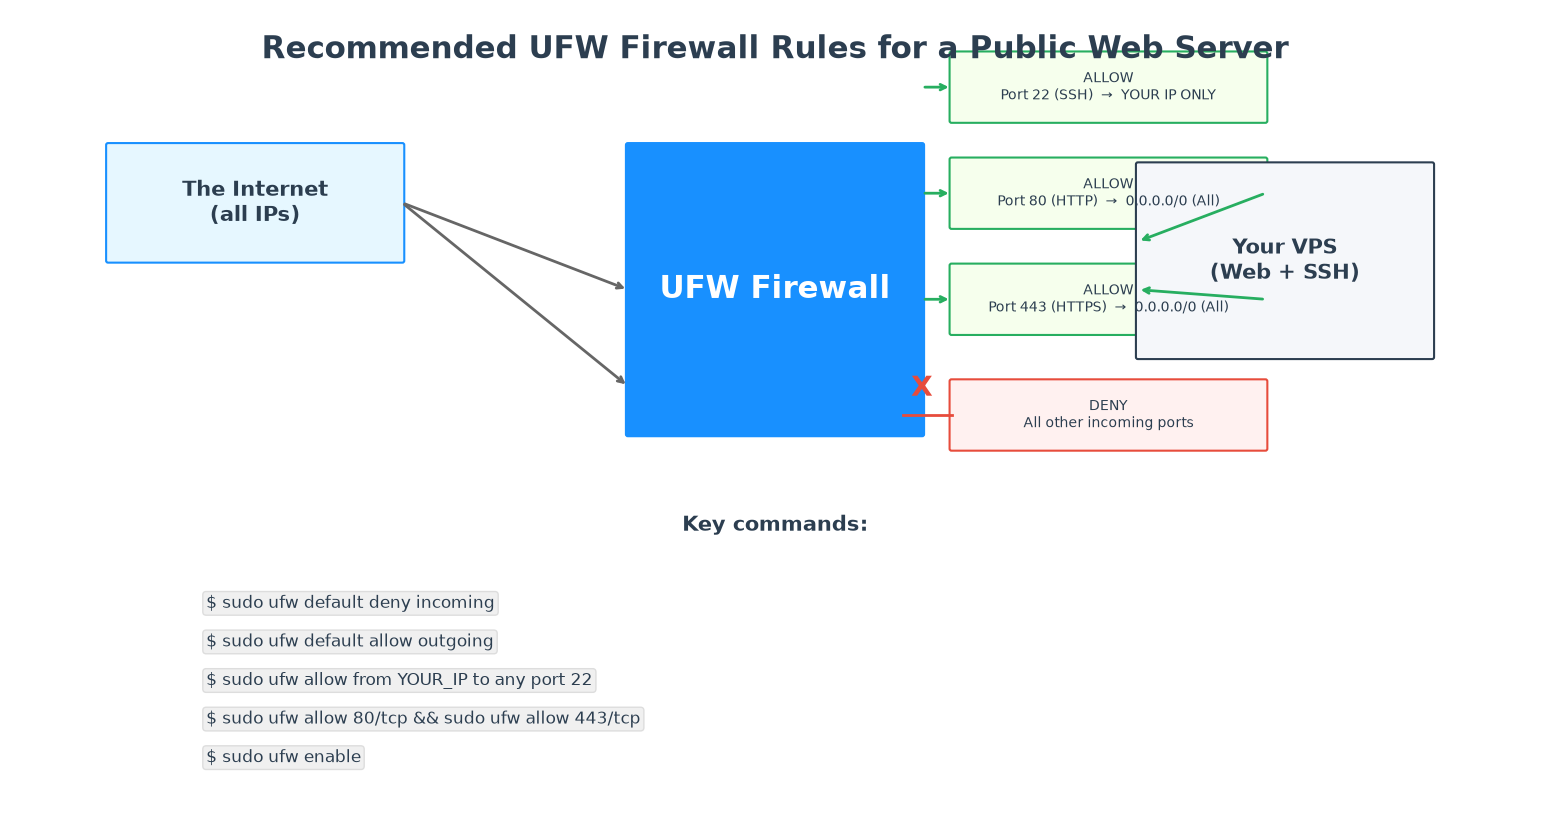
Recommended UFW rules: only open 22 (from your IP), 80, and 443. Deny everything else.
sudo ufw default deny incoming
sudo ufw default allow outgoing

# Whitelist your OWN IP for SSH first!
sudo ufw allow from YOUR_HOME_IP_ADDRESS to any port 22

# Open web ports
sudo ufw allow 80/tcp
sudo ufw allow 443/tcp

# Enable the firewall
sudo ufw enable
sudo ufw status verbose
If you accidentally lock yourself out, use the LuckVM web VNC console to fix the rules.
Step 5: Install fail2ban to block brute-force attempts
fail2ban monitors your auth logs and automatically bans IP addresses that repeatedly fail to log in:
sudo apt install fail2ban -y
sudo systemctl enable fail2ban
sudo systemctl start fail2ban
The default configuration already protects SSH. View banned IPs with sudo fail2ban-client status sshd.
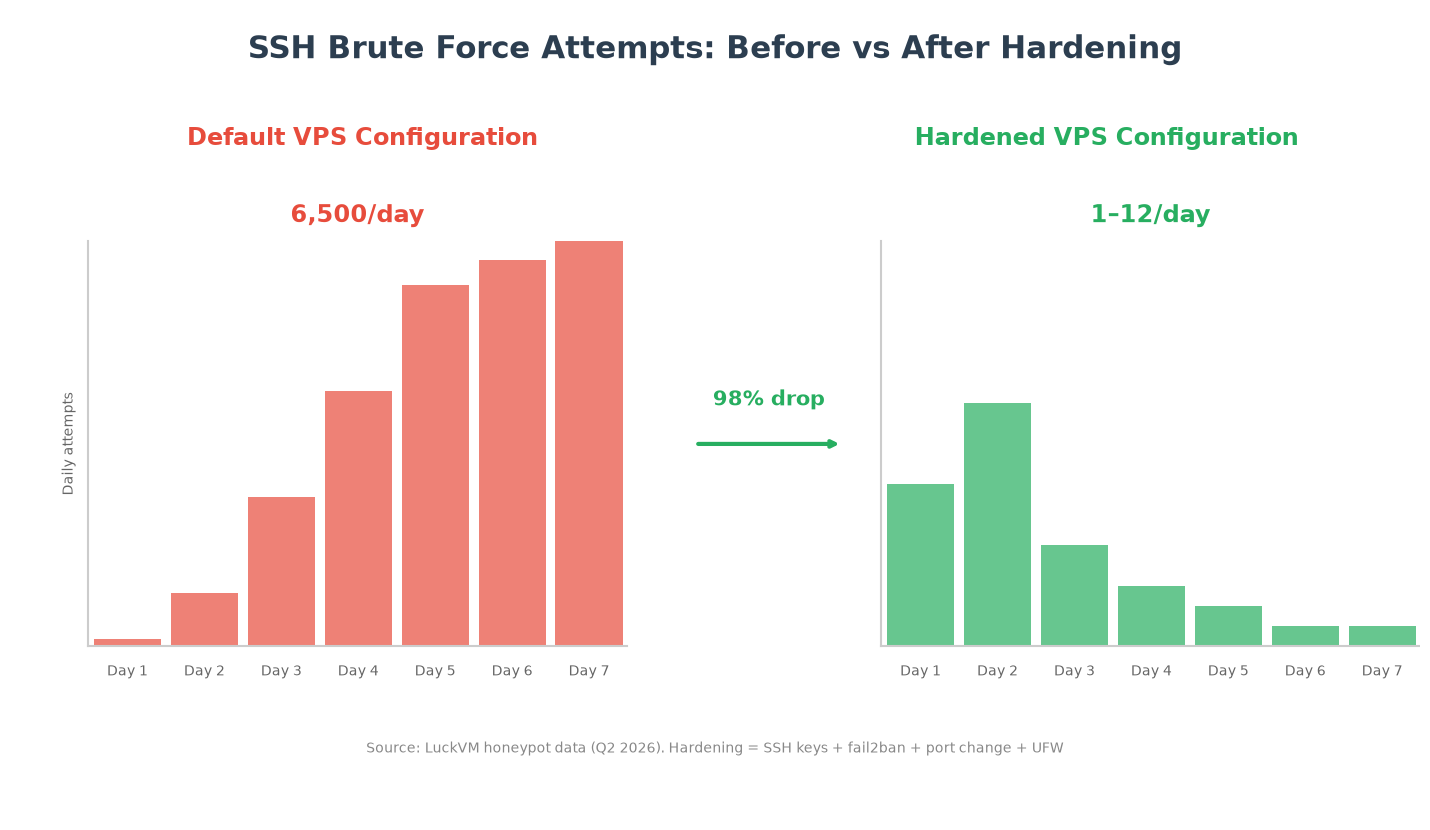
Enabling SSH keys + fail2ban + UFW drops SSH brute-force traffic from 6,500/day to 1–12/day. (LuckVM honeypot data, Q2 2026)
Tier 2 — The 5 Important Steps (Week 1)
Once the critical fixes are in place, these five SSH hardening and server security steps add defense-in-depth without significant maintenance overhead.
Step 6: Change the SSH port
Changing port 22 to a non-standard port doesn't stop a targeted attacker, but it eliminates noise from mass-scanning bots:
# Edit /etc/ssh/sshd_config -> Port 2222
sudo sed -i 's/#Port 22/Port 2222/' /etc/ssh/sshd_config

# Update UFW BEFORE restarting SSH
sudo ufw allow 2222/tcp
sudo ufw delete allow 22
sudo systemctl restart sshd
Connect with: ssh -p 2222 yourusername@your_server_ip
Step 7: Secure shared memory
Add to /etc/fstab:
tmpfs /run/shm tmpfs defaults,noexec,nosuid 0 0Remount: sudo mount -o remount /run/shm
Step 8: Enable automatic security updates
sudo apt install unattended-upgrades -y
sudo dpkg-reconfigure -plow unattended-upgrades
Step 9: Harden kernel parameters with sysctl
Add to /etc/sysctl.conf:
net.ipv4.tcp_syncookies = 1
net.ipv4.conf.all.accept_source_route = 0
net.ipv4.conf.all.rp_filter = 1
net.ipv4.conf.all.accept_redirects = 0
net.ipv4.conf.all.send_redirects = 0
Apply: sudo sysctl -p
Step 10: Set up intrusion detection with AIDE
sudo apt install aide -y
sudo aideinit
sudo cp /var/lib/aide/aide.db.new /var/lib/aide/aide.db
Run checks with: sudo aide --check
Tier 3 — The 5 Optional Hardening Steps
For production environments handling customer data, payments, or PII:
Step 11: Enable two-factor authentication for SSH
sudo apt install libpam-google-authenticator -y
google-authenticator
Edit /etc/pam.d/sshd to add auth required pam_google_authenticator.so, then set ChallengeResponseAuthentication yes and AuthenticationMethods publickey,keyboard-interactive in sshd_config.
Step 12: Install auditd for detailed logging
sudo apt install auditd -y
sudo systemctl enable auditd && sudo systemctl start auditd
Step 13: Disable unused services and ports
sudo ss -tulpn
sudo systemctl stop servicename
sudo systemctl disable servicename
Step 14: Set up automated off-server backups
- Daily automated snapshots in the LuckVM control panel
- Weekly remote backups to object storage using
resticorduplicity - Test restores quarterly — untested backups are not backups
Step 15: Deploy a WAF and DDoS protection
sudo apt install libapache2-mod-security2 -yAdd a reverse proxy WAF (Cloudflare or similar) for production sites.
Security vs Usability: Finding the Right Balance
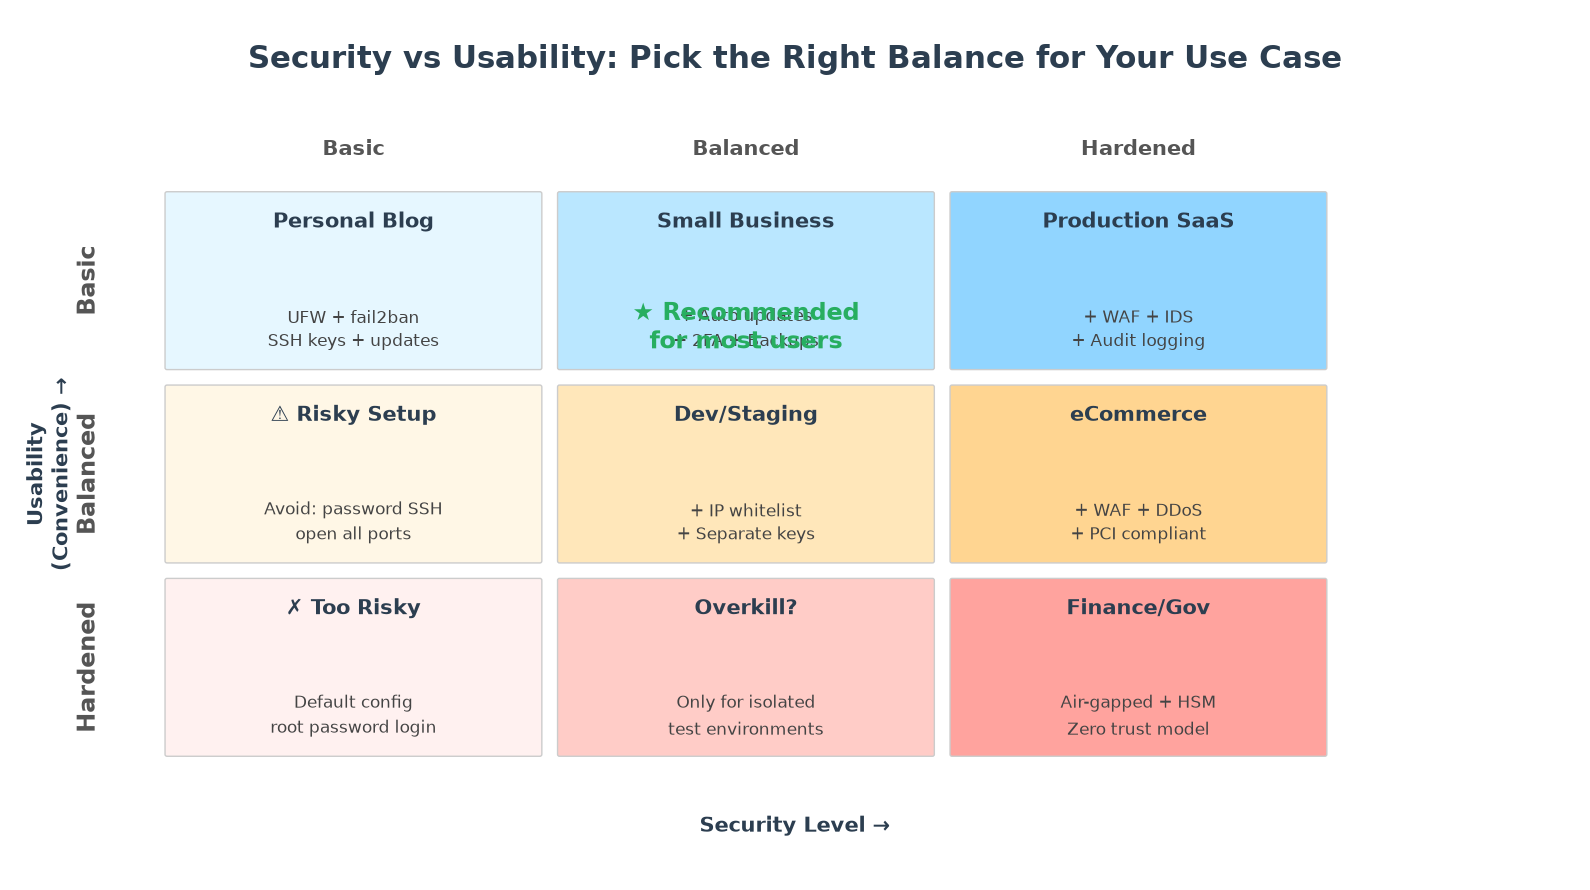
Match your hardening level to your use case. Tier 1+2 is the recommended sweet spot for most LuckVM customers.
- Personal blog / hobby site: Tier 1 is sufficient.
- Small business / SaaS MVP: Tier 1 + Tier 2 + backups. This is the recommended sweet spot.
- eCommerce / payment processing: All 15 steps + WAF + DDoS + regular scans.
- Enterprise / financial: Hardware keys, zero-trust, dedicated monitoring.
How LuckVM Keeps Your Server Safe at the Infrastructure Level
Server security starts before you log in. Every LuckVM VPS includes infrastructure-level protections you can't configure from inside a guest OS:
- Automatic DDoS mitigation — volumetric floods detected and filtered within seconds
- Isolated KVM virtualization — fully isolated instances; a compromised neighbor cannot access your data
- CN2 GIA + Tier-1 network across Asia-Pacific, reducing route hijacking exposure
- On-demand snapshots in the client area for fast rollback
Pricing starts at $8.80/month in Hong Kong and Los Angeles, $11.00/month in Tokyo, Singapore, Seoul, and Frankfurt.
Frequently Asked Questions
Tier 1 takes 25–30 minutes for an admin comfortable with the command line. Tier 2 adds about an hour. Tier 3 typically takes 2–4 hours. You don't have to do it all in one sitting.
Yes. root is the only username that exists on every Linux server by default, making it the primary target for brute-force attacks. Using a named account with sudo removes this universal username from the attack surface.
It is technically obscurity, but it reduces log noise by 95%+ against automated bots that only scan port 22. It should never be your only defense — SSH keys + fail2ban are the actual blockers — but it's effective for zero cost.
Use the web VNC console available in the LuckVM client area. It connects directly to your server's virtual console outside of networking, so you can always fix misconfigurations.
Yes. Encrypt your SSH private key with a strong passphrase stored in a password manager (Bitwarden, 1Password, KeePass). TOTP backup codes should be stored there too, not in plaintext.
Tools like lynis (auditing) and ansible-hardening are great for automation, but you should understand what each step does before relying on a script. Once you've done it manually, automating future builds is excellent practice.
Yes. WordPress is the most-targeted CMS in the world due to its plugin ecosystem. At minimum, install Wordfence; for production sites, put Cloudflare or a similar reverse proxy WAF in front of your origin.
LuckVM provides infrastructure-level DDoS protection and network isolation as standard on all plans. OS-level hardening (this VPS hardening guide) is the customer's responsibility on unmanaged VPS plans, though support can assist with snapshots and console access.
Deploy a Hardened VPS with Built-in DDoS Protection
LuckVM VPS plans start from $8.80/month with data centers in Hong Kong, Tokyo, Seoul, Singapore, Los Angeles, and Frankfurt. All plans deploy in 5–10 minutes with KVM isolation and automatic DDoS mitigation.
Browse LuckVM VPS Plans →Last updated: September 2026. Commands tested on Ubuntu 22.04 LTS and 24.04 LTS.